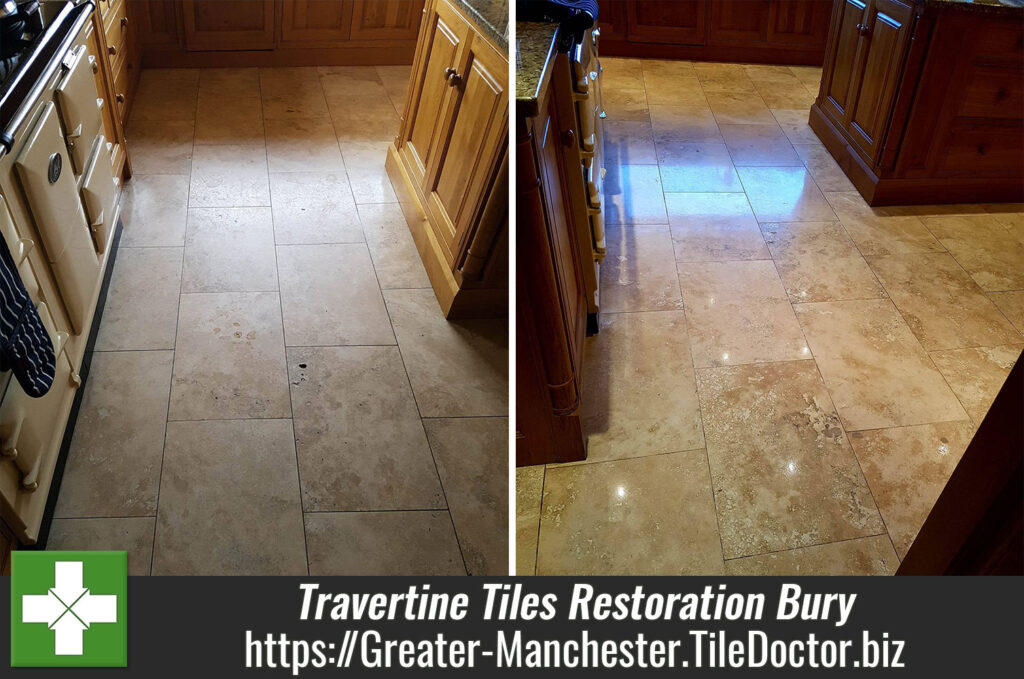
Burnishing and Sealing to Restore Travertine Tiles in Bury
Travertine is a distinct and characterful stone that makes for some truly beautiful tiled floors. However, like any natural stone the main difficulty with Travertine tiles is keeping them looking fantastic and unfortunately without regular maintenance its appearance can decline over time.
This customer, who lives in Bury, contacted me for this exact reason. For the past decade, she had attempted to keep her Travertine floor clean by using some kind of wax polish, only to find that this actually made maintenance more difficult, the wax built up in layers and was difficult to remove.

I visited the property to conduct a test clean and determine the kind of results I could achieve through restoring the entire floor. The customer was very impressed with the small area I cleaned and booked me in on the same day to complete the full job.

Cleaning a Travertine Tiled Floor
As a result of my successful test clean, I already knew that the best process to restore the tiles was burnishing. This involves the application of different grades of diamond encrusted burnishing pads to strip away dirt and staining, and gradually polish the stone to achieve a quality shine.
Normally on Travertine tiles I would start by applying the Coarse 400 and Medium 800 grit pads, followed by moving up to Fine 1500 and Very Fine. In this particular case, I started by using a Very Coarse 200 grit burnishing pad to strip off the wax coating and old sealers from the tiles. The pad was fitted to a rotary machine and lubricated with a small amount of water.
After finishing with the 200-grit pad, I removed all soiled water with my wet vacuum. There were still few areas of wax left in the corners of the room, and on these areas, I used a 200 grit handheld burnishing block.
When I finished with first round of burnishing, I repeated the exact same process with the 400, 800, and 1500 grit pads, rinsing away the soil in between until I was left with a high quality polished finish right across the floor.

After completing the burnishing, I filled a number of small pitted holes in the stone using a beige flexible epoxy-based grout to match the rest of the floor. I then left the floor to dry until the next day.
Sealing a Travertine Tiled Floor
The next day I returned to the property and used a damp tester to make sure the floor was dry enough for sealing. Usually with polished tiles this isn’t a problem, but sometimes the grout can be an issue. Luckily, there weren’t any issues with dampness.
Before sealing I went over the floor again using the Very Fine grit pad with a tiny amount of water as lubricant. Finally, I sealed the floor with our impregnating sealer known as Tile Doctor Colour Grow. The sealer penetrates the stone and enhances the natural colours and patterns in the stone. I polished off any excess sealer with several cotton cloths.

To make sure the floor was in pristine condition I went over the floor for a final time with the Very Fine grit pad to smoothen the surface after sealing.

The customer was extremely pleased with the result, and even promised to recommend me to her daughter to clean and seal her Marble tiled floor. I also left her a free bottle of Tile Doctor Neutral Tile Cleaner to help her ensure the floor stays beautiful, we recommend Neutral Clean for the regular cleaning of sealed floor as most supermarket cleaners are acidic and will reduce the life of your sealer over time.
Restoring the Polish on a Travertine Tiled Floor in Greater Manchester
Burnishing and Sealing to Restore Travertine Tiles in Bury Read More »