greater manchester

Porcelain Tiled Plank Floor Leigh Grout Colouring

Planked Effect Porcelain Floor Renovated after Water Damage in Leigh

I was originally called to this home in Leigh to deep clean approx. 100m2 of porcelain floor tiles in the living area after recent works, but plans changed somewhat when I arrived.

Porcelain Tiled Plank Floor Leigh Before Renovation

On my arrival the owners informed me that since my last visit to quote for cleaning the Porcelain floor a leak had come through the ceiling. This had left the previously dark grout in the textured ‘plank’ effect porcelain looking washed out and, leaving the floor in need of a refresh. I strongly suspect it wasn’t the leak that caused the problem, but the use of strong cleaning products used afterwards to clean up the mess, a lot of these cleaning products contain bleach, and this can wash the colour out of grout.

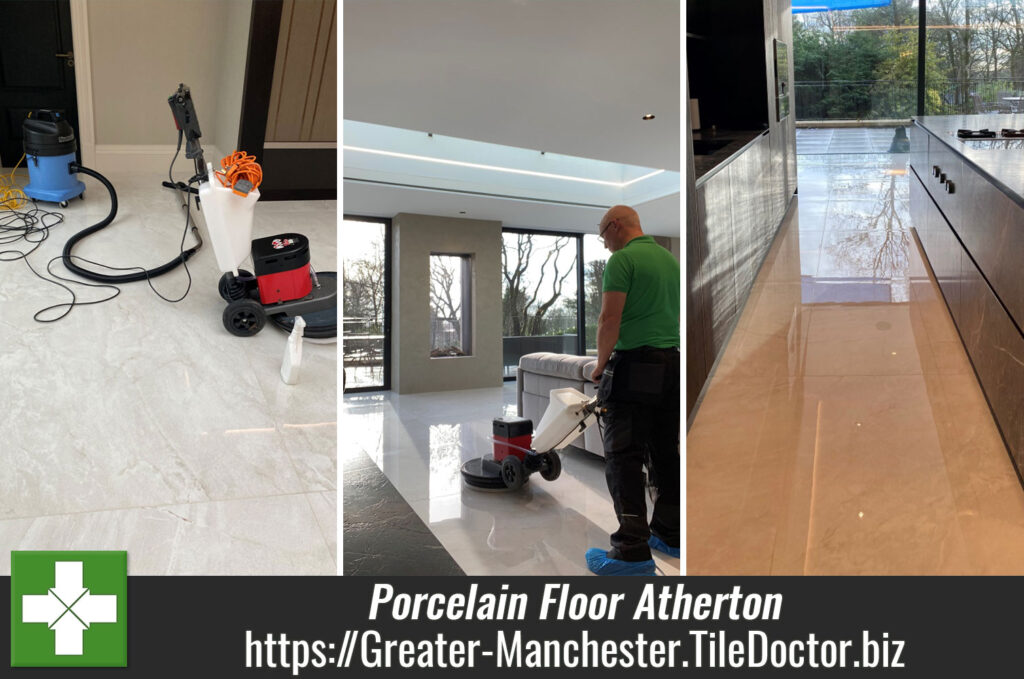
Out of interest the main issue we encounter with this type of flooring is grout haze, which occurs when the installer doesn’t manage to remove all the grout. This results in a thin film of grout on the surface which detracts from the final appearance. This probably happens with all installations but is certainly very evident on porcelain. The solution is to give the floor an acid wash using Tile Doctor Grout Clean Up, but most tilers don’t bother.

After discussion it was agreed to re-focus the time, we had available on the grout. However, after a deep clean it became clear the grout would need recolouring to look it’s best.

Grout Colouring Porcelain Floor Tiles with Chocolate Grout Colouring

Applying a Tile Doctor Grout Colourant in Chocolate colour was the ideal solution and after an urgent call to Tile Doctor HQ I set up a delivery to ensure it would be with us the next morning.

In the meantime, I continued the preparation of the grout and cleaning of the tiles using Tile Doctor Grout Clean-up which not only removes the grout haze but will also etch the surface of the grout to ensure a superior bond with the colourant.

That afternoon we also discussed the high gloss porcelain floor in the hallway, the owners had spent a lot of time polishing it themselves since installation and were not completely happy with it. I setup a floor buffer fitted with a 3000-grit pad and dry burnished a small section in the hallway. The difference was obvious, and they could see an immediate improvement, as a result they decided to rebook me to do a day polishing as well once the living room was completed.

I returned on day two to find the colourant had arrived and so started the process of recolouring the grout with the chocolate colourant. This is a straightforward process but very time consuming as with these thin planks there were a lot of grout lines to cover.

Afterwards the tiles were gently buffed with a White pad before leaving to dry. The owners were very pleased with the result commenting we had done a “brilliant job in the front room.” Later he added the following feedback:

“Kevin was excellent and did a fantastic job at the house.”

Porcelain Tiled Plank Floor Leigh After Grout Colouring

They also booked us in to do the polish on the next available date, but I’ll discuss that in a separate post.

Porcelain Tiled Plank Floor Leigh After Grout Colouring Porcelain Tiled Plank Floor Leigh After Grout Colouring


Professional Restoration of a Porcelain Planked Tiled Living Area in Greater Manchester

Planked Effect Porcelain Floor Renovated after Water Damage in Leigh Read More »

High Gloss Marble Effect Porcelain Floor Polishing Atherton

High Gloss Marble Effect Porcelain Kitchen Floor in Atherton

The tiled floor shown isn’t Marble, it is actually high gloss Porcelain made to look like Marble installed in a house near Atherton. This was my second visit to the property after originally resolving several issues with another Porcelain tiled floor that was laid with wood grain effect Porcelain planks.

High Gloss Marble Effect Porcelain Floor Atherton Before Polishing High Gloss Marble Effect Porcelain Floor Atherton Before Polishing

I had noticed the floor in the Kitchen whilst working at the property on my first visit and so I offered to improve its appearance using a 3000-grit polishing pad. Impressed with the difference I was able to achieve I was booked in to do the whole floor.

Cleaning a Marble Effect Porcelain Tiled Kitchen Floor

On arrival I took some readings with a gloss meter so I could assess the gloss levels before and after the work, this would enable me to assess the level of improvement once finished. Sometimes it is difficult to see the difference, so this meter is useful for validating the process actually made an improvement, in this case however I need not have worried!

High Gloss Marble Effect Porcelain Floor Atherton During Polishing High Gloss Marble Effect Porcelain Floor Atherton During Polishing

This was a large area, but I was confident that the polishing could be done in a day. The process involves fitting a 3000-grit diamond burnishing pad to a floor buffer and slowly running the pad over each tile at least three times. This very fine diamond pad gently cleans and brings up the polished appearance of the Porcelain. The whole area is polished in this manner and then followed up with a soft white buffing pad just to further refine the polished appearance.

High Gloss Marble Effect Porcelain Floor Atherton During Polishing

In addition, we removed some silicone sealant that had spread onto tiles from the adjoining expansion joints.

The gloss meter readings confirmed an improvement and as the owner pointed out the floor now looked like it had water on the surface, such was the deep nature of the polish I had managed to achieve.

Gloss Meter Reading Atherton Before Polishing
Gloss Meter Reading Before Polishing
Gloss Meter Reading Atherton After Polishing
Gloss Meter Reading After Polishing

Sealing High Gloss Porcelain Tiles

In this instance there was no need to seal the floor as this type of Porcelain is sealed in the factory during production. However, the last step before leaving was to discuss aftercare cleaning.

High Gloss Marble Effect Porcelain Floor Atherton After Polishing High Gloss Marble Effect Porcelain Floor Atherton After Polishing

For this floor I recommended Tile Doctor Stone Soap, whilst I appreciate this is not a stone floor this product contains a patina enhancer that will help maintain the polished appearance of the tile.

My clients were delighted with the work we carried out.


Professional Polishing of a High Gloss Porcelain Tiled Kitchen Floor in Greater Manchester

High Gloss Marble Effect Porcelain Kitchen Floor in Atherton Read More »

Victorian Fireplace Hearth Tiles Renovated in Altrincham

Renovation of Victorian Hearth in Altrincham

Our client was renovating the front room of her Victorian home including the old Fireplace in Altrincham South of Sale in Manchester. After lifting the carpet directly in front of the fireplace with a view to stripping back the wooden floorboards she found an original tiled hearth which she liked and decided she wanted to have restored.

Victorian Fireplace Hearth Tiles Before Cleaning Altrincham

The property had several other original features, so my client was very keen to try and retain as many as she could. After trying several specialist fireplace restorers without any success, she contacted us.

The tiles were in quite a state, but the main issue was the adhesive that the carpet has been secured with. With reasonable expectations of what could be achieved she hoped we could improve this little bit of history and we offered to see what we could do to improve them.

Victorian Fireplace Hearth Tiles Before Cleaning Altrincham Victorian Fireplace Hearth Tiles Before Cleaning Altrincham

Armed with a range of Tile Doctor products we sampled various options before settling on a combination of Pro-Clean and Nanotech HBU cleaner. HBU stands for Heavy Build Up and is especially effective on textured surfaces. I gave her a quote for the work which she was happy to accept, and we booked in a time to carry out the work.

Victorian Fireplace Hearth Tiles During Renovation Altrincham

Cleaning a Victorian Tiled Hearth Floor

The combined products were applied to the hearth tiles and left to for fifteen minutes so they could get to work breaking down the old adhesive and dirt. Then the solution was gently agitated with a small brush to work it in further and loosen the adhesive, mortar, dirt and grime allowing it to be carefully scraped off. I used a wet vacuum to extract the resultant soiling followed by rinsing and more vacuuming.

Victorian Fireplace Hearth Tiles During Renovation Altrincham

With the tiles clean the next step was to fill any gaps that had now appeared before drying. As the area was small there was only a short time needed to dry the tiles, enough time for a cuppa.

Sealing Victorian Hearth Tiles in Greater Manchester

To improve the look of the tiles even further I gave them a very gentle dry burnish using a six inch 3000-grit diamond polishing pad fitted to a small buffer running at slow speed. This was used to remove light scratches and bring back a gentle sheen to the tile.

Victorian Fireplace Hearth Tiles During Renovation Altrincham

Finally, I gave then tiles a coat of Tile Doctor Colour Grow sealer to improve colour and add protection.

Victorian Fireplace Hearth Tiles After Renovation Altrincham

The hearth tiles were transformed by the work and my client commented it was so much better than they had dared hope could be achieved and plans to dress the area with candles or a fire basket. It is amazing what a small feature can do to the overall look of the room, and it really brought the colours out of the patterned tiles which surround the fireplace.

For their next project they are planning to strip the wood floorboards back, hoping for similar success, however I can’t help them with that.

Later my client posted the following 5 Star review on the internet:

“Kevin cleaned the hearth tiles on my Victorian fireplace which had been hidden by carpet and underlay for many years and they now look beautiful. All done quickly and efficiently and at a reasonable cost.”

Victorian Fireplace Hearth Tiles After Renovation Altrincham

For aftercare cleaning of any sealed tile, I recommend the use of Tile Doctor Neutral Tile Cleaner. It’s a gentle but effective tile and grout cleaner that won’t impact the sealer which can be the problem with some of the more aggressive products you find in supermarkets.


Professional Restoration of a Victorian Hearth Tiles in Greater Manchester

Renovation of Victorian Hearth in Altrincham Read More »

Victorian Tiled Hallway Floor Restoration Urmston

Victorian Tiled Hallway restoration in Urmston

I was contacted by a couple from London who were relocating to a 1850’s Victorian property in Urmston, Manchester which they were renovating before the move. During the renovation they uncovered a Victorian tiled floor in the hallway and having decided to retain as many original features in the property as possible they made a decision to renovate the floor.

Victorian Tiled Hallway Before Cleaning Urmston

With our clients wanting to move in early Feb 2024 I quickly arranged to survey the floor and work out what could be done. Whilst there I was able to re-assure them that the tiles could indeed be restored however, we would need to minimise the use of water in case it leaked through into the cellar below.

To work around the cellar issue, I recommended using Tile Doctor low moisture products to strip and clean the floor of old sealer, dirt and grime and then to apply a sealer to protect it going forward. As part of the work, I agreed to complete several minor repairs which included re-sitting some loose tiles and replacing the worst of the missing/broken tiles.

Victorian Tiled Hallway Before Cleaning Urmston

Cleaning/Repairing a Victorian Tiled Hallway Floor

Before starting work, I took a moisture reading from the floor so I could establish a base level. This followed with the application of Tile Doctor Oxy-Gel cleaner, which because it’s a gel it is very easy to control and won’t cause any issues with the cellar below. The gel is applied to the tile and grout, brushed in and then left for ten to fifteen minutes so it can get to work breaking down old sealers and dirt. The gel is then scrubbed into the tiles using a rotary machine and the soiling generated is removed with wet vacuum.

The floor was then inspected, and I used more Tile Doctor Oxy-Gel with handheld diamond burnishing pads along the edges. Further work was also needed to remove stubborn marks so for this I used a scraper and small amounts of Tile Doctor Remove and Go and Nanotech HBU cleaner which are stronger products. The floor was then given a quick rinse with minimal water and then extracted quickly with the wet vacuum.

Finally, I gave the floor an acid rinse with Tile Doctor Acid Gel which can remove old grout smears that can detract from the tile’s appearance. This product also neutralises the ph level of the floor following the use of the alkaline cleaners used earlier.

Work then started on the repairs which involved lifting the loose and broken tiles, cleaning out the subfloor of old adhesive and then re-fitting with fresh adhesive. The broken tiles were replaced with tiles I had managed to source before starting the job.

Victorian Tiled Hallway After Cleaning Urmston

With the bulk of the work done the floor was left to dry off fully overnight.

Sealing a Victorian Tiled Hallway Floor

Before beginning the work the next day, I took several moisture readings to ensure the floor was as dry as it was the previous morning. All was well and I was able to apply the first coat of sealer for which I used Tile Doctor Colour Grow which as its name suggests contains a colour enhancer that really brings out the colours in Victorian tiles. This product is also an impregnator which works by soaking into the pores of the tile adding protection from within.

Once the base layer of sealer had dried, I added a coat of Tile Doctor X-Tra seal to add further protection and add a satin sheen to the floor. I left this to dry and then gave the floor a quick buff with a white pad to remove any excess sealer and bring up the appearance of the tiles even further.

The results where exactly what our customers wanted with them commenting “Wow what a difference the tiles look beautiful ?? thank you so much for your work”.

Victorian Tiled Hallway After Sealing Urmston

For aftercare cleaning I made a point to recommend they use Tile Doctor Neutral Tile Cleaner, it’s especially formulated for cleaning sealed floors and won’t impact the sealer which can be an issue with the products you find in supermarkets.

Victorian Tiled Hallway After Sealing Urmston


Professional Restoration of a Victorian Tiled Hallway in Greater Manchester

Victorian Tiled Hallway restoration in Urmston Read More »

Flagstone Floor Renovation Saddleworth

1850’s Flaking Flagstone Flooring Renovated in Saddleworth

A couple from Saddleworth contacted us about their flagstone flooring which was laid throughout the ground floor in their home which was built around 1850. Since buying their home they had decided to take up the carpets and floor coverings to most of the ground floor (approx. 60sqm) to allow the floor to breathe and help with some damp issues in the walls. In addition, it would be in keeping with the house to have its original floor back in use and make a great period feature.

Flagstone Floor Before Renovation Saddleworth

With the stone covered for such a long period the main issue was ingrained dirt and grime as well as the remnants of self-levelling compound and paint. The whole floor also had flaking issues on numerous stones and was very uneven in parts.

After some discussion over the phone around the options of cleaning, stone milling, repointing, and sealing I scheduled a survey. I recommended the floor needed the render removed, stone milled (and possibly repointing) before cleaning and finally sealing. An impregnating sealer which provided a matt, colour-enhancing finish was recommended in view of the damp and animals. In addition, we suggested the use of breathable pointing.

Flagstone Floor Before Renovation Saddleworth Flagstone Floor Before Renovation Saddleworth

Whilst the work was more involved than initially anticipated, they fully understood the scale of the problems and what was needed and so decided to go ahead.

Cleaning/Repairing a Victorian Tiled Hallway Floor

Work started with the application of 50-Grit Extra Coarse Milling pads which were fitted to a weighted rotary floor machine. The pads were run over each of the rough Yorkshire flagstones to remove the top of the flaking stone and reveal new stone underneath. The process was lubricated with water and Tile Doctor Remove and Go, the water helps keep the dust down and the Tile Doctor Remove and Go helps clean up the stone. We used quite a lot of these pads to clean up the whole floor. The resultant slurry was rinsed away with water and extracted with a wet vacuum.

Flagstone Floor During Renovation Saddleworth

Once done, the process was then repeated using 100-grit and then 200-grit milling pads to improve the surface of the stone. I must give credit to Russell Taylor from Lancashire Tile Doctor for his experience and assistance on this job, an extra pair of hands were needed given the scale of the work and to speed up work given the owners were still living in the property.

We next used an acid wash Tile Doctor Grout Clean-Up, this is to counter any efflorescence salts that can be generated with floors like this that have no damp proof course. After application it was rinsed off and extracted with the wet vacuum.

After this the pointing was then redone using a modern flexible product.

Sealing a Flagstone Tiled Floor

The floor was then left to dry out for a few days before returning to seal the floor using Tile Doctor Colour Grow which is an impregnating sealer that contains a colour enhancer to bring out the natural colours in the stone. This product is also breathable which is an important consideration for old floors like this.

Flagstone Floor After Renovation Saddleworth Flagstone Floor After Renovation Saddleworth

The project went well, and the floor was completely transformed. My clients were very happy with the work and left the following feedback for us.

“Kevin and Russell did a great job on our flagstone floor. They regularly checked in with us throughout the process and worked around us being in the house most of the time with no problems! Highly recommend.”

Flagstone Floor After Renovation Saddleworth Flagstone Floor After Renovation Saddleworth

For aftercare cleaning I recommend they use Tile Doctor Neutral Tile Cleaner which is a mild yet effective tile cleaner that won’t harm the sealer.

Professional Restoration of a Flagstone Tiled Floor in Greater Manchester

1850’s Flaking Flagstone Flooring Renovated in Saddleworth Read More »

Victorian Tiled Vestibule Restoration Cheadle

Restoring a Victorian Tiled Vestibule Discovered Under Carpet in Cheadle

The owner of this property in Cheadle discovered a small Victorian tiled floor in the vestibule at the front of the house, under what they described as a “grotty grey carpet”. They couldn’t believe they had been covered over by a previous owner and were made up to find such a lovely period feature which although very dirty appeared to be complete.

Victorian Tiled Vestibule Cheadle Before Cleaning

I was asked if I could replace the loose grouting and renovate the tiles to bring back as much of their original character as possible. Happy to oblige, I visited the property to inspect the tiles and confirm the work needed to restore the floor. From this I provided the owners with a quote which they were happy to accept, and we arranged a time to complete the work.

Cleaning and Repairing a Victorian Tiled Hallway Floor

I started the renovation of the Victorian vestibule tiles with a deep restorative clean to remove heavy soil and old sealers. Properties of this age do not usually have a damp proof membrane and I was wary that using a lot of water on the floor may exacerbate damp issues and take much longer to dry out; with that in mind I decided to use a low moisture Gel cleaning product called Tile Doctor Oxy-Gel.

The product is applied to the tiles, the after about ten minutes it’s worked in with a mechanical buffing machine fitted with a black scrubbing pad. This process brings the dirt to the surface and turns the gel black in the process. The machine just about fitted into the space however the circular pads struggle to get into the corners so for that I then reverted to a handheld scrubbing brush and more Tile Doctor Oxy-Gel. The now soiled gel was then removed using a little water and a wet vacuum system designed to keep the mess to a minimum.

There was evidence of white efflorescence salts on some of the tiles which isn’t surprising considering the age of the property and the location of the tiles. To resolve this, I gave the tiles an acid rinse and sticking with the low moisture then I applied Tile Doctor Acid Gel. This product further cleans up the tiles and being acidic dissolves the salts and neutralises the pH level of the floor after the use of Oxy-Gel earlier. I used the same system as before, working the gel in with a pad and by hand then extracting with a wet vacuum.

Sealing a Victorian Tiled Hallway Floor

After carrying out some minor grout repairs, we left the area to fully dry overnight before returning the following day to seal with Tile Doctor X-Tra Seal. This product is fully breathable and so will allow for moisture to rise through the tile and evaporate at the surface, perfect for a floor without a damp proof membrane. Once done the floor had a nice matt finish, but the delightful colours of the original tiles now really shone through and lifted the whole entrance area.

Victorian Tiled Vestibule Cheadle After Cleaning

My client was very pleased with the outcome and left the following glowing comment on the Tile Doctor feedback system.

“Absolutely amazing craftsmanship. I asked for the tiles to be preserved with their characteristics rather than ‘repaired’ and he did exactly that. They somehow look brand new while still showing their story from the day they were laid. He has cleaned them up beyond expectation and protected them for hundreds of years to come!”

For aftercare I recommended the use of Tile Doctor Neutral Tile Cleaner, it’s a gentle yet effective floor cleaning product that’s safe to use on sealed tiles and will help to keep the area looking pristine in the future.

Professional Restoration of a Victorian Tiled Vestibule in Greater Manchester

Restoring a Victorian Tiled Vestibule Discovered Under Carpet in Cheadle Read More »

Travertine Floor Renovated in Stockport

Renovating Pitted Travertine Tiled Flooring in Stockport

This client was from Stockport and had a travertine tiled floor laid over twenty years ago through the kitchen and adjacent dining space. The floor had the usual issues for travertine with dirt collecting in the small pits in the stone and becoming ingrained in the pores due to the sealer wearing off. The owner was talking of ripping the whole floor up as they had given up trying to keep it clean.

Travertine Kitchen Floor Before Cleaning

I recommended deep cleaning the floor with a set of burnishing pads to remove the ingrained dirt, filling in the worst pits and then sealing the stone. My quote was a little more than they were expecting but they appreciated the fact there was a lot of work to do and that the diamond encrusted abrasive pads required are quite expensive. On balance obviously it was cheaper than replacing the floor. We also discussed the final appearance of the stone floor; they wanted the stone to look as natural as possible keeping the colour light with just a slight sheen.

Travertine Kitchen Floor Before Cleaning Travertine Kitchen Floor Before Cleaning

Deep Cleaning a Travertine Tiled Floor

Work started on the agreed date with an application of Tile Doctor Pro-Clean which was diluted 1 part cleaner to 5 parts water and sprayed onto the floor. After letting it dwell for ten minutes it was worked in and followed up with an abrasive 120-grit silicon carbide pad attached to a floor buffer fitted with added weights to increase traction. The dirt released from the floor was then rinsed off with water and extracted with a wet vacuum.

The stone was then burnished using the coarser pads from the set of burnishing pads that I mentioned earlier. I started with the 400-grit on the weighted floor buffer and worked it into each of the travertine tiles using only water for lubrication. The pads get the ingrained dirt out of the stone, bringing it to the surface where it is rinsed off with water and then extracted again with the wet vacuum. This process was then repeated with the finer 800-grit pad which is the first step in polishing the surface of the stone.

The last step on day one was to review the travertine, identifying and filling the worst of the pits with a specialist filling compound that would harden overnight.

Sealing a Travertine Tiled Floor

On arrival the next day my clients said they loved the results so far and were relieved their problem floor was finally going to be resolved.

I started day two with the application of the third burnishing pad which is 1500-grit. This was applied using the same method, running it over each tile around three times using only water for lubrication. This third pad gave the stone the natural sheen they were after. For highly polished stone I would follow this up with a fourth pad which is 3000-grit however for this floor it wasn’t necessary.

Once the floor was dry it was then sealed with Tile Doctor Ultra-Seal which in an impregnating sealer that adds almost invisible protection to achieve that natural light appearance they wanted. Impregnators work by seeping into the stone, occupying the pores so dirt can’t become ingrained there.

Travertine Kitchen Floor After Cleaning Travertine Kitchen Floor After Cleaning

My clients were very happy with the result saying how I had made a real difference and how well it looked, in fact they didn’t want anyone to walk on it just in case. I recommended they used Tile Doctor Stone Soap for everyday cleaning. It’s a mild but effective cleaner that will help maintain the appearance of the stone without impacting the sealer which can be harmed by stronger cleaning products.

Travertine Kitchen Floor After Cleaning

They also left the following comment on the Tile Doctor feedback system.

Amazing job. Our floor has never looked so good. Its better now than when first laid. Kevin was very professional and careful and meticulous in his restoration work.
 

Professional Renovation of a Travertine Tiled Floor in Greater Manchester

Renovating Pitted Travertine Tiled Flooring in Stockport Read More »

Travertine Shower Cubicle Before and After Renovation Didsbury

Grubby Tumbled Travertine Shower Cubicle Renovated in Didsbury

Travertine like any natural stone is porous and needs to be sealed if you want to maintain its appearance. As a result, it is not something I would recommend for use in a shower cubicle such as this example at this property in Didsbury. The sealer had long worn off leaving the stone vulnerable to stains from soap dyes and washed in dirt. The shower cubicle was also stained with mould which had taken a hold in places.

Tumbled Travertine Shower Cubicle Before Cleaning East Didsbury Tumbled Travertine Shower Cubicle Before Cleaning East Didsbury

My client had tried all sorts of cleaning products and recommended solutions but had failed to get a handle on the problem and so decided to call us in. I popped along to the property to do a site visit. It is always better for us to see the job so we can present an accurate quote, rather than just from pictures. I carried out a small patch test to with several different products to see what would work best and to show the client it could be solved. They were happy with the potential result and agreed to my quote. With that agreed we arranged a mutually convenient time to return and complete the work.

Cleaning a Tumbled Travertine Tiled Shower Cubicle

My approach was to deep clean the travertine with a strong dilution of Tile Doctor Pro-Clean sprayed onto the tile and grout and then scrubbed in by hand. This is assisted with a steamer to help lift the dirt from the pores. Tile Doctor Pro-Clean is a concentrated, multi-purpose high-alkaline cleaner, which strips and degreases. It is diluted dependent on how dirty the area is and can be applied neat to help lift the most difficult stains. The dirt and cleaning solution was then rinsed off with water and I turned my attention to renovating the appearance of the Tumbled Travertine with a series of six inch burnishing pads fitted to a hand buffer.

Tumbled Travertine Shower Cubicle During Cleaning East Didsbury Tumbled Travertine Shower Cubicle During Cleaning East Didsbury

The burnishing pads are applied in series from coarse to fine starting with the 400-grit pad which deep cleans the stone and removes old sealers, coatings and any remaining contaminates. Water is used to lubricate the process and the soil generates is rinses off the Travertine before moving onto the next pads (800-grit, 1500-grit and finally 3000-grit) which refine of hone the stone back to its original appearance. This process is always easier in the shower as the water can be drained away, in other areas we would use the wet vacuum to extract the waste.

Sealing a Tumbled Travertine Tiled Shower Cubicle

Once the shower tiles were dry, I applied two coats of Tile Doctor Colour Grow to seal the tiles and protect them going forward. This is a colour intensifying sealer that soaks into the pores of the stone preventing dirt from becoming ingrained there and thereby providing long lasting protection. As well as an excellent stone and grout sealer, Colour Grow is fully breathable so any damp trapped behind the stone can rise through the tile and evaporate.

Once that was completed, I stripped out the old silicone sealant around the base of the shower wall and tray and then replaced it with fresh using Jasmine coloured silicone.

Tumbled Travertine Shower Cubicle After Cleaning East Didsbury Tumbled Travertine Shower Cubicle After Cleaning East Didsbury

The Tumbled Travertine shower cubicle looked unrecognisable after I had finished and my client who was most impressed with the transformation left the following glowing feedback:

“Kamila was absolutely fantastic – very professional and friendly, knew exactly what to do and shower looks brand new. Would definitely recommend!”

Most supermarket tile cleaning products are unsuitable for cleaning sealed natural stone (always read the label) so for regular cleaning going forward I recommended Tile Doctor Aqua-Pro. It’s a spray on cleaner that has a neutral pH formula so its safe to use on sealed stone yet its strong enough to eliminates soap scum build-up and hard water deposits when used regularly. The fresh lemon scent leaves the shower smelling clean and fresh.


Professional Renovation of a Tumbled Travertine Shower Cubicle in Greater Manchester

Grubby Tumbled Travertine Shower Cubicle Renovated in Didsbury Read More »

Ceramic Tile Grout Before and After Renovation Levenshulme

Flaking Grout Renovation in Levenshulme Bathroom

We were contacted by a client from the Levenshulme area of Greater Manchester who had just purchased a property there and hated the state of the grout which despite cleaning did not improve. The owner said she could not use the bathroom in this state as it looked disgusting and unclean and was keen to have it renovated. The rest of the house was being redecorated so whilst that was going on, I was called over to have a proper look at the grout and quote for sorting it out.

Ceramic Tiled Bathroom Before Renovation Levenshulme Ceramic Tiled Bathroom Before Renovation Levenshulme

It didn’t take long to understand the issue, is seems the previous owner in an attempt to improve the appearance of the grout had touched it up by applying another thin layer of grout on top of the original. Now both the new and old was starting to flake off making a real mess.

Flaking Grout Levenshulme Bathroom Before Renovation Flaking Grout Levenshulme Bathroom Before Renovation

I explained to the client we would need to scrape out the new layer, clean the original and then apply a grout colourant to improve the overall appearance. I gave her a price for the work, and she was happy for me to go ahead with the job.

Cleaning a Ceramic Tiled Bathroom Grout

My first task was to scrape off the new layer of grout, so I had a stable grout line to work from. I then started cleaning the grout up using a Tile Doctor Grout Colourant Pre-Treater cleaner, this cleans up the grout and being acidic it etches the surface to provide a better base for the grout colourant to adhere to. The dirt was rinsed off and then the area was dried using a heat gun.

Once dry I used a Tile Doctor Grout Colourant in Charcoal Grey (one bottle was sufficient). This product is equally effective for interior or exterior applications including bathrooms and kitchens and it is available in ten different colours. The client had requested to darken the grout and give it a completely new modern look. The colourant is painted onto the grout with a small brush and any excess which gets onto the tile is removed with a cloth before it dries.

Ceramic Tiled Bathroom During Grout Colouring Levenshulme Ceramic Tiled Bathroom During Grout Colouring Levenshulme

The best thing about the grout colourant is it forms an easy to clean seal over the grout which ensures the grout is protected. Given Ceramic tiles are glazed and therefore don’t need sealing the new combination should ensure the tiles keep their appearance for a very long time with minimal cleaning. The silicone sealant between the bath and the wall tiles looked in good condition and had not discoloured so there was no need for this to be replaced.

Ceramic Tiled Bathroom After Renovation Levenshulme Ceramic Tiled Bathroom After Renovation Levenshulme

The bathroom now looked clean and inviting and I’m pleased to report my client was very happy with the completed renovation and was finally happy to use the bathroom!

I recommended that for on-going cleaning that they use Tile Doctor Aqua-Pro, this is a pH neutral cleaner with a trigger action for easy application. It can be used in the bathroom every day. It helps to keep soap scum and limescale at bay and has a pleasant lemon smell so cleaning should not be too much of a chore.

Ceramic Tiled Bathroom After Renovation Levenshulme


Professional Renovation of a Ceramic Tiled Bathroom in Greater Manchester

Flaking Grout Renovation in Levenshulme Bathroom Read More »

Riven Green Slate Floor Before After Cleaning Sealing Oldham

Dark Green Riven Slate Floor Cleaned and Sealed in Oldham Kitchen

The pictures below are of a Dark Green Riven Slate floor that was installed around twenty years ago in the kitchen of a property in Oldham. The floor was renovated about 12 years ago, but the client did not follow recommendations from the previous contractor about the use of a Neutral Cleaning product or topping up the sealer each year. As a result, the slate had become progressively dirtier as the sealer wore down and dirt became ingrained in the stone making it difficult to clean. The slate was now dull and had lost its character, the grout was also looking grubby and there was talk of having it removed and replaced.

Riven Slate Floor Before Cleaning Oldham Riven Slate Floor Before Cleaning Oldham

I went over to Oldham to survey the floor and quote for renovating the floor. Whilst I was there, I discussed the fact that natural stone floors like this Slate floor need to be sealed in order to keep the dirt out of the pores of the stone. Once dirt becomes ingrained in the stone its very difficult to keep it clean and the only way to restore its original appearance is to give it a deep clean and apply a fresh sealer. Keen to have the floor restored and relieved to hear I could clean the grout they gave me the go ahead and we arranged a date for my return.

Cleaning a Natural Dark Green Riven Slate Tiled Kitchen Floor

To get the floor clean I followed my usual technique of applying a strong dilution of Tile Doctor Remove and Go, leaving it to dwell for ten minutes and then working it in with a rotary machine fitted with a scrubbing pad. I also used more Tile Doctor Remove and Go along the grout lines and scrubbed it in with a scrubbing brush and a steam cleaner. The floor was then rinsed with water and all the soils extracted with a wet vacuum. The floor was inspected, and any stubborn areas re-treated with a repeat of the process until I was satisfied the Slate tile and grout was as clean as it could be.

Riven Slate Floor During Cleaning Oldham

One problem I had was cleaning behind the big American fridge freezer, I had to wait until the adjacent floor was clean and fairly dry before I could move the fridge onto it, allowing me to get behind and clean the floor. Fortunately, the water pipe going to the fridge was just long enough to be able to easy mover fridge backwards.

Riven Slate Floor Before Cleaning Behind Fridge Oldham Riven Slate Floor During Cleaning Behind Fridge Oldham Riven Slate Floor After Cleaning Behind Fridge Oldham

Getting the Slate tile and grout clean took up the whole of day one and before leaving I put several specialist floor fans in place to assist with the drying process.

Riven Slate Floor During Cleaning Oldham

Sealing a Dark Green Riven Slate Tiled Kitchen Floor

The next day the floor was clean and dry, in fact I always use a damp meter to check the moisture level in the stone to ensure its dry before sealing. The cleaning process had removed all the dirt from the stone but had also taken away some of the natural oils which now needed to be put back.

To do this I applied a coat of Tile Doctor Stone Oil which is an impregnating sealer designed to enhance the colour and texture of floors and improve mechanical strength once cured. Once the Stone Oil had dried, I followed with a coat of Tile Doctor Ultra Seal to add further protection. This is a no-sheen, natural-look sealer that provides maximum stain protection.

Riven Slate Floor During Sealing Oldham Riven Slate Floor During Sealing Oldham

Once the sealer had dried the floor looked fantastic, certainly my customer thought so and left the following on-line review:

“Kamila was quick to contact me and was helpful, friendly and professional. She has done a fantastic job stripping, cleaning and resealing my kitchen slate floor. I would highly recommend her work! Katy, Oldham”

We discussed maintenance cleaning and I re-iterated the point about using a Neutral Tile cleaner for the regular cleaning of the floor and the benefits of using the Tile Doctor maintenance program which they are considering.

Riven Slate Floor After Sealing Oldham Riven Slate Floor After Sealing Oldham


Professional Restoration of a Dark Green Riven Slate Tiled Kitchen in Greater Manchester

Dark Green Riven Slate Floor Cleaned and Sealed in Oldham Kitchen Read More »

Scroll to Top